
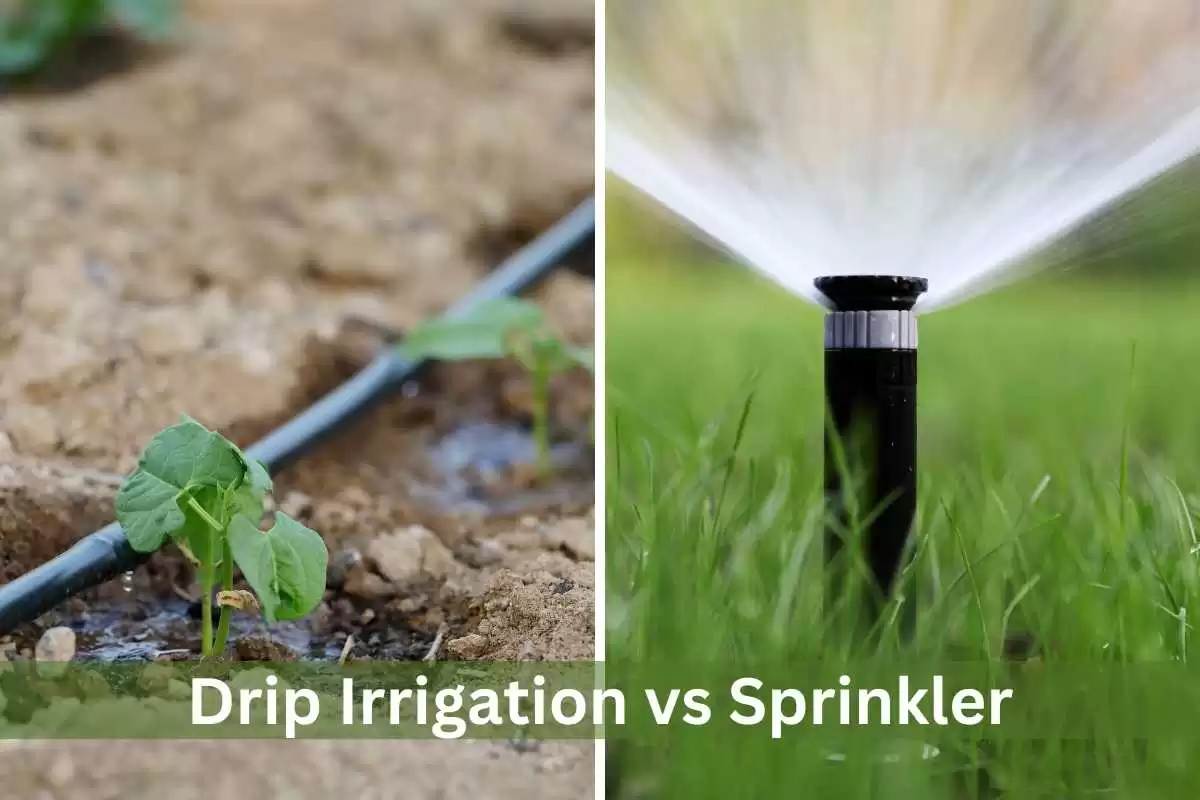
Is drip irrigation worth the money and installation hassle? The short answer is yes, overwhelmingly so—if you are watering a vegetable garden, flower beds, shrubs, or trees. It is the single most effective upgrade you can make for water efficiency and plant health.
However, the “pros and cons” aren’t one-size-fits-all. The value of drip irrigation changes depending on your goals. We’ve broken this guide down for the three people who search this topic:
The DIY Gardener (The “Is it worth $150?” User)
Verdict: Yes. For a typical raised bed or small vegetable garden, a $100-$150 drip irrigation kit often pays for itself in a single growing season through water savings alone, not to mention the time saved (no more hand-watering) and healthier, more productive plants. The “con” of installation is usually a one-time, 2-hour project.
The Prosumer / Landscaper (The “TCO vs. Sprinklers” User)
Verdict: Yes, but for different reasons. You already know sprinklers are wasteful for garden beds. Your concern is Total Cost of Ownership (TCO) and durability. The “pro” for you is unparalleled efficiency on difficult terrain (slopes, clay) and precision. The “con” is that drip requires a different type of maintenance (filter cleaning, winterization) than sprinklers (broken heads).
The System Upgrader (The “Why is my system failing?” User)
Verdict: Yes, and this guide will fix your problems. If your current (likely cheap) drip system is failing, it’s almost certainly due to clogging or pressure issues. The “cons” you are experiencing are not flaws in the technology, but flaws in the installation—specifically, a missing filter or pressure regulator.
The “Pros”: Why Drip Irrigation is the Gold Standard for Gardens
The advantages go far beyond just saving water; they directly impact plant health, your time, and what’s possible in your landscape.
Pro 1: Unmatched Water Efficiency (90% vs. 50% for Sprinklers)
This is the most cited benefit for a reason. Drip irrigation systems deliver water directly to the plant’s root zone, virtually eliminating loss from wind, evaporation, and runoff. Studies from university extensions like the University of Rhode Island consistently show drip systems operate at 90% efficiency or higher, compared to traditional sprinklers, which can be as low as 50-70% efficient.
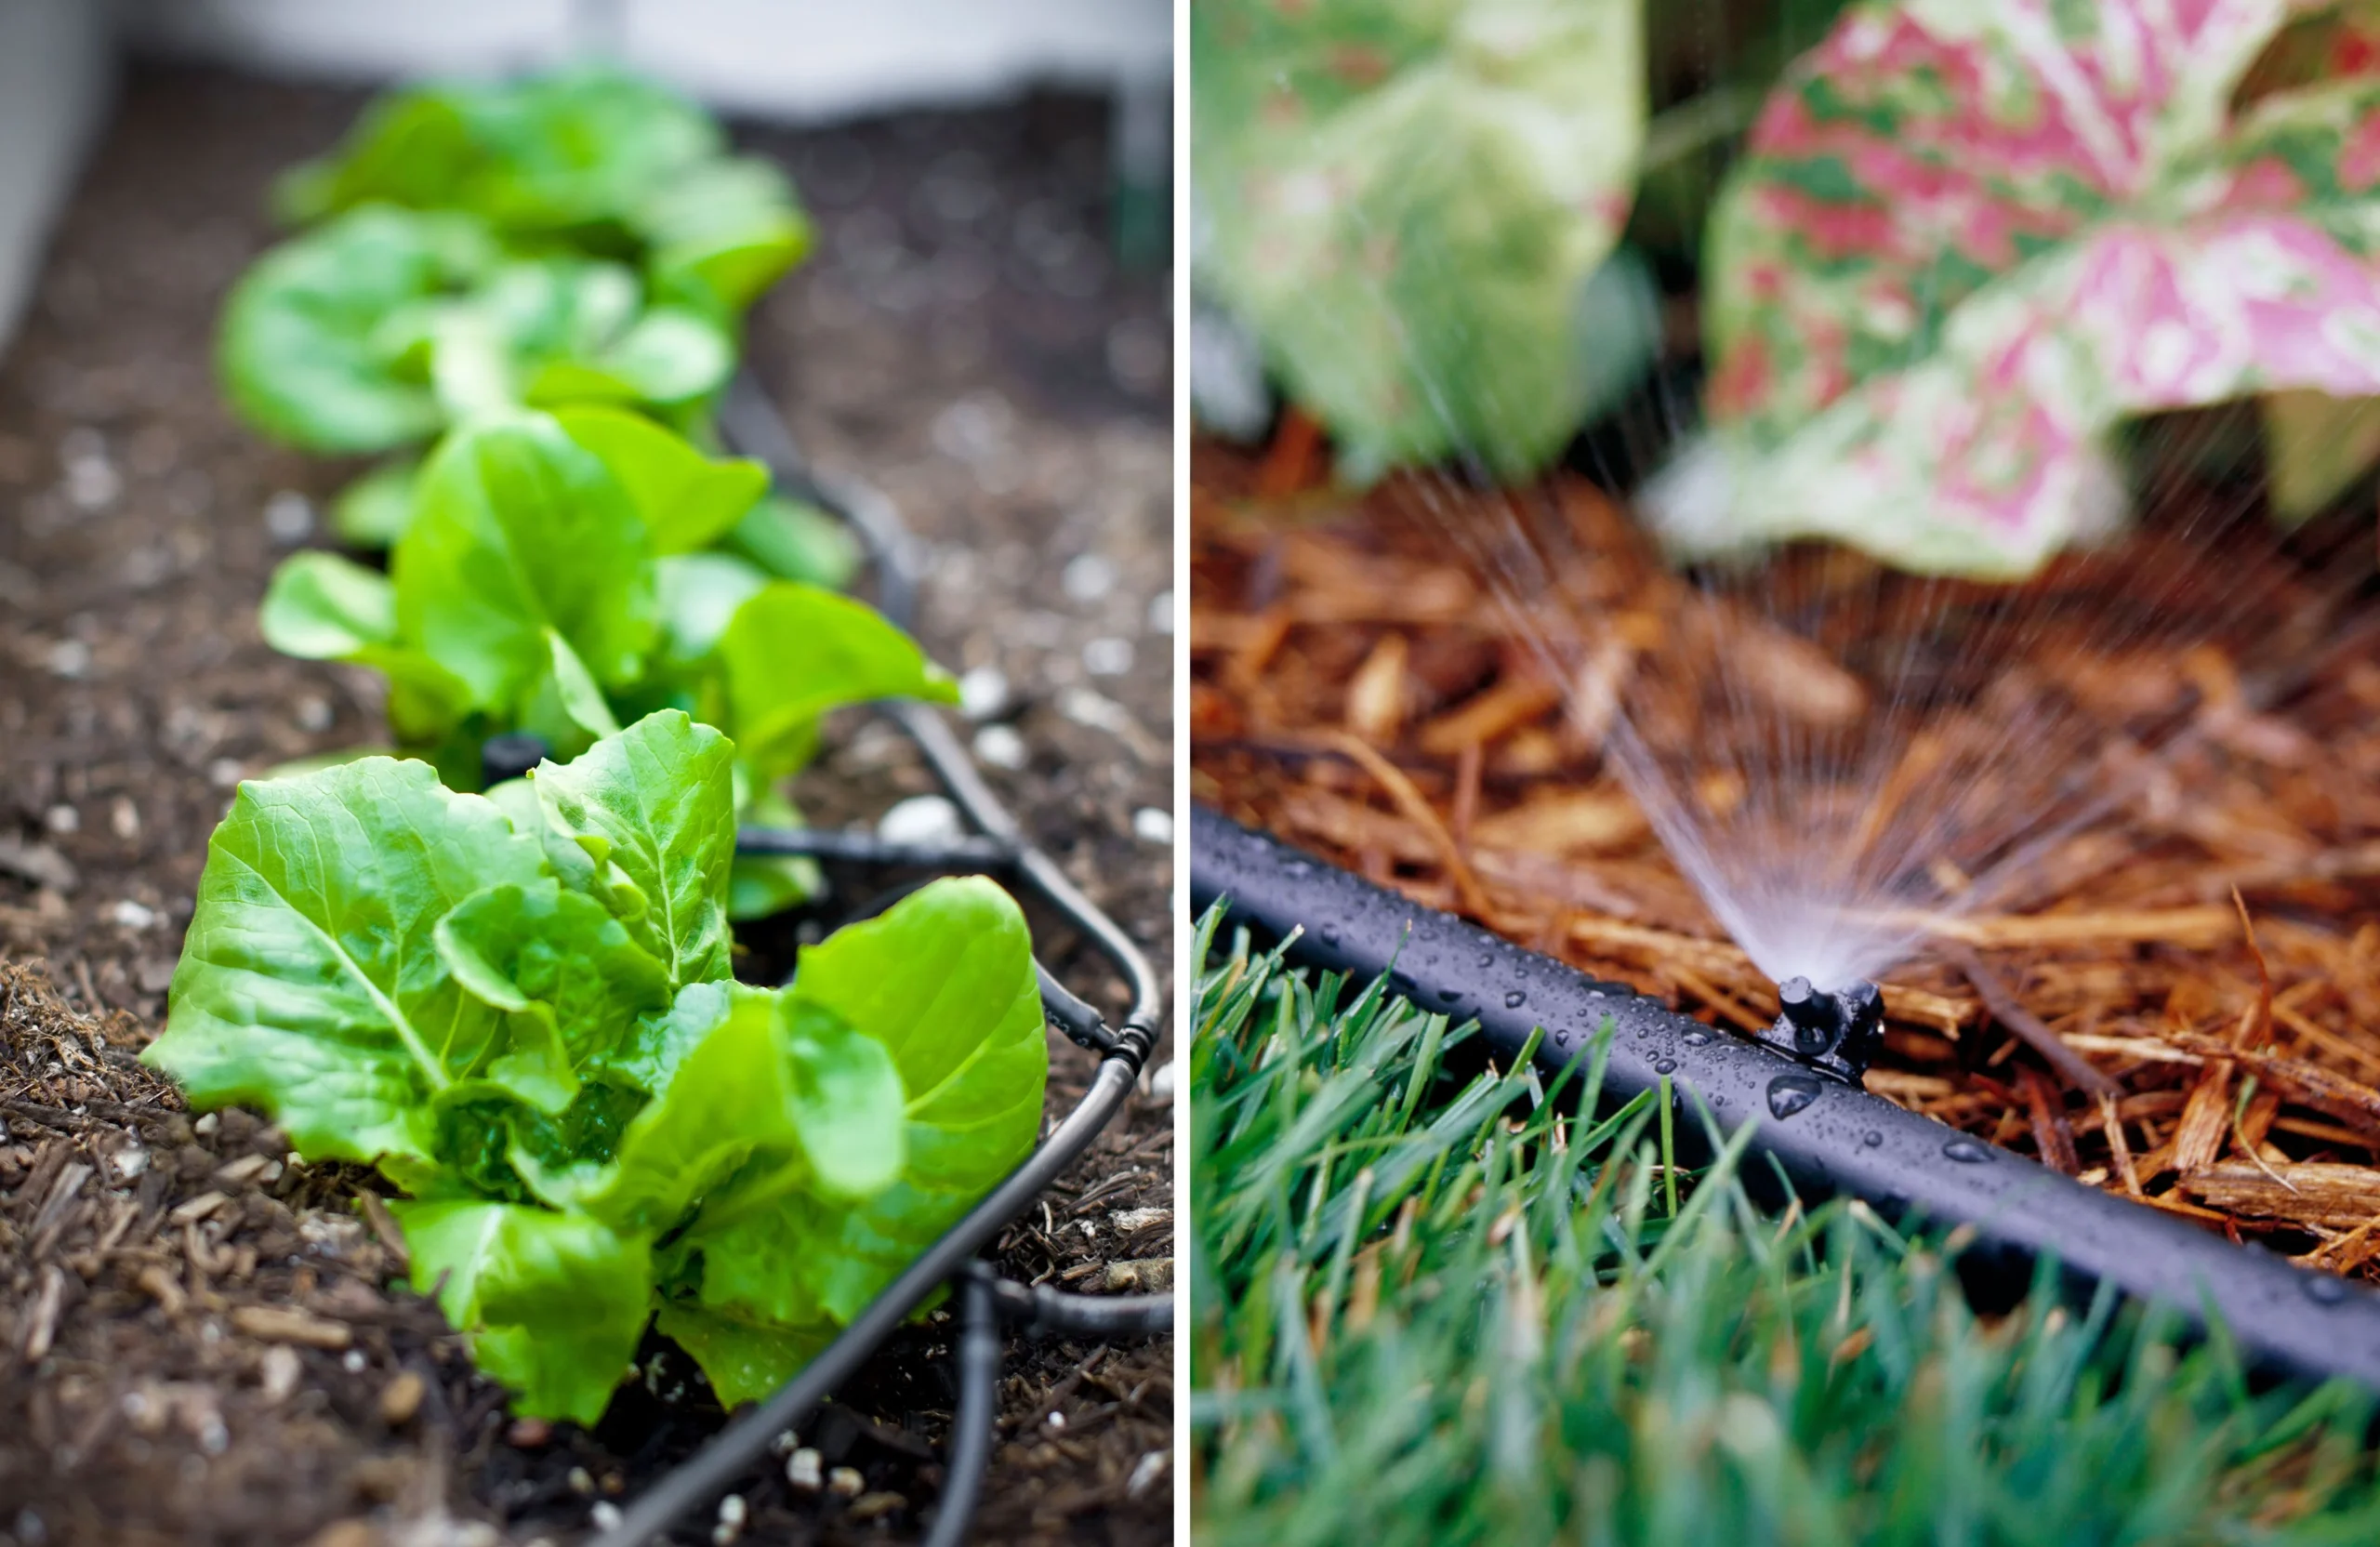
Pro 2: Healthier Plants and Reduced Disease
Sprinklers wet plant foliage, creating the perfect environment for fungal diseases like powdery mildew and black spot. Drip irrigation keeps leaves dry by applying water only to the soil. This single change can dramatically reduce disease pressure in your garden, especially for susceptible plants like tomatoes, roses, and squash.
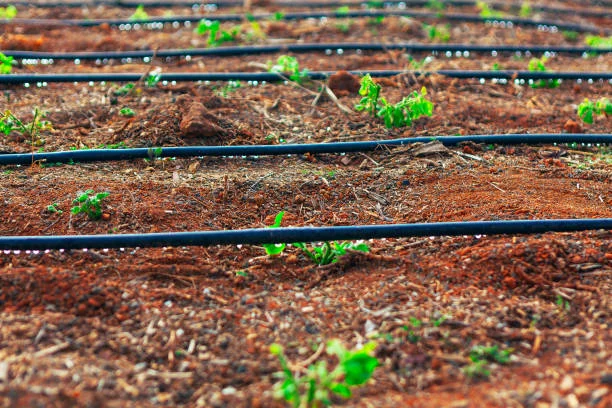
Pro 3: Unlocks Difficult Terrain (Slopes, Clay Soil, Odd Shapes)
Watering a sloped yard with sprinklers results in massive runoff; the water flows downhill before it can be absorbed. Drip irrigation solves this by applying water slowly, allowing even heavy clay soils to absorb it fully. It’s the only practical way to effectively water plants on inclines or in irregularly shaped garden beds.
Pro 4: Significant Time Savings and Automation
Hooked up to a simple battery-operated timer, a drip system automates your daily watering chores. This consistency is better for your plants and frees up your time. It’s the “vacation-proof” garden solution, ensuring your plants thrive even when you’re away.
Pro 5: Calculating Your 1-Year ROI (A 100 sq. ft. Garden Case Study)
The “con” of initial cost can feel intimidating. Let’s break it down.
- Initial Investment: ~$150 for a quality beginner kit (e.g., Rain Bird)
- Water Savings: Assume you use 50% less water than with a sprinkler for a 100 sq. ft. garden, watering 4 times a week. This can easily translate to $15-$30 per month in savings on your water bill during a 4-month growing season ($60-$120 total).
- Time Savings: If you spend 15 minutes a day hand-watering, that’s 7 hours per month. At a conservative value of $15/hour, that’s over $100 in saved time per month.
Verdict: The financial and time savings often allow the system to pay for itself within the first season.
The “Cons”: A Hard Look at 5 Drip Irrigation Problems (And Their Solutions)
Here’s the truth competitors won’t tell you: nearly every “con” of drip irrigation is an avoidable installation error, not a flaw in the technology. Here’s how to solve them.
Con 1: Clogging — The #1 Frustration
Why it Happens: Clogs are the main reason people give up on drip. According to research from institutions like the University of Florida (UF/IFAS), clogs fall into three categories:
- Physical: Sand, silt, or debris from your water source.
- Chemical: Mineral buildup (calcium, iron) from hard water precipitating out and forming scale.
- Biological: Algae or bacterial slime growing inside the lines.
[Solution] The 3-Layer Fix: Filtration, Flushing, and Pressure Control
- Filtration (Non-Negotiable): You must install a filter between your water source and the drip system. A simple 150-200 mesh screen filter removes most physical particles.
- Flushing (How-to): At the start and end of each season, open the end caps on your main lines and let water run through for a few minutes to flush out any accumulated sediment.
- Pressure Control: High pressure can cause minerals to precipitate. Keeping pressure in the correct range (see Con 5) helps prevent chemical clogs.
Con 2: Installation Complexity and Initial Cost
Why it Happens: For a beginner, the array of tubes, emitters, and connectors can seem complex, and the initial cost is higher than a cheap garden hose.
[Solution & Comparison] Drip Kit vs. Soaker Hose: Why the “Cheaper” Option Often Fails A soaker hose seems like a cheap, easy alternative. However, it’s a false economy. Soaker hoses deliver uneven amounts of water (gushing at the start, trickling at the end), clog easily, degrade in 1-2 seasons, and are incompatible with pressure regulators, making them inefficient. A quality drip kit, while more expensive upfront, is a far more reliable long-term investment.
Con 3: System Durability (UV Rays, Freezing, and Animal Damage)
Why it Happens: Polyethylene tubing is susceptible to damage from sunlight (UV degradation), freezing temperatures (cracking), and curious animals (rodents, dogs) chewing on the lines to get water.
[Solution & Quality Impact] Mulch Cover, Quality Tubing, and Brand Choice
- Cover It: The easiest solution is to cover your drip tubing with a 2-3 inch layer of mulch. This protects it from UV rays and hides it from animals.
- Quality Matters: This is where brands like Rain Bird make a difference. Their tubing uses higher-grade, UV-resistant polymers that last significantly longer than no-name vinyl hoses.
- Winterize: In cold climates, you must drain the system to prevent cracking (see next section).
Con 4: Ongoing Maintenance (It’s Not “Set-and-Forget”)
Why it Happens: Because it’s a precisely engineered system, it requires occasional check-ups to function correctly.
[Solution] The 4-Step Seasonal Maintenance Checklist & How to Winterize
- Spring Start-up: Flush the main lines, clean the filter screen, and check emitters for consistent flow.
- Mid-Season: Inspect and clean the filter every month (or more with well water).
- Fall Shutdown (Winterizing): This is critical. Disconnect the head assembly (filter, regulator) and store it indoors. Use an air compressor set to a low PSI (under 30) to blow all remaining water out of the lines. This prevents ice from expanding and cracking the tubing and emitters.
- Ongoing: Walk the lines occasionally to spot leaks or damage from animals.
Con 5: Water Distribution Issues (The “End-of-Line” Problem)
Why it Happens: This is the most critical technical failure that almost all beginner guides miss. Water pressure naturally drops over the length of a tube. Without the right components, emitters at the beginning of the line will release far more water than emitters at the end, leading to over- and under-watered plants.
[Solution & The Non-Negotiable Fix] Why You MUST Use Pressure Regulators and Pressure-Compensating (PC) Emitters
- Pressure Regulator: Your home’s water pressure (50-70 PSI) will blow out a drip system, which is designed to run at 20-30 PSI. You must install a pressure regulator right after the filter.
- Pressure-Compensating (PC) Emitters: These are the magic bullet. A PC emitter has a tiny internal diaphragm that automatically adjusts to maintain a constant flow rate (e.g., 1 gallon-per-hour) regardless of its position on the line. For any run longer than 30 feet or on any kind of slope, they are non-negotiable for ensuring every plant gets the same amount of water.

Drip Irrigation vs. Sprinklers vs. Soaker Hose: The Decision Matrix
Choose the right tool for the job. Here’s a clear breakdown:
| Feature | Drip Irrigation | Sprinkler System | Soaker Hose |
|---|---|---|---|
| Best Use Case | Gardens, raised beds, trees, shrubs, slopes | Large, flat turf lawns | Small, level garden beds (short-term) |
| Water Efficiency | Excellent (90%+) | Poor to Fair (50-70%) | Fair (70-80%) |
| Initial Cost | Medium ($100-$300 DIY Kit) | High ($500+ DIY) | Very Low ($20-$50) |
| Install Difficulty | Medium (2-4 hours) | High (Requires trenching) | Very Easy (5 mins) |
| Maintenance Needs | Medium (Filter, Winterize) | Medium (Broken heads) | High (Clogs, degrades quickly) |
Verdicts:
- For Lawns: Sprinklers are the clear winner for cost-effective coverage of large turf areas.
- For Gardens, Trees & Shrubs: Drip irrigation is the undisputed champion for health, efficiency, and flexibility.
- For a Small, Level Garden on a Tight Budget: A soaker hose can work for one season, but be prepared for its limitations and short lifespan.
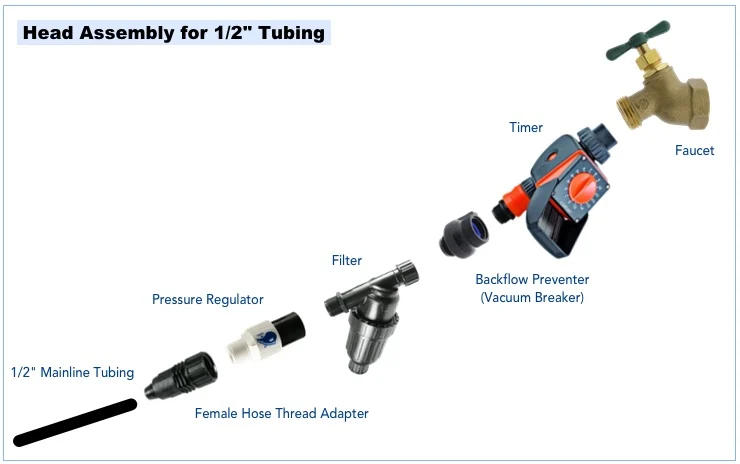
How to Start: Your First Drip System (Kits & Key Components)
Whether you buy an all-in-one kit or purchase components separately, every successful system needs these five parts, connected in this order:
- Backflow Preventer: Stops irrigation water from siphoning back into your home’s drinking water supply.
- Filter: The #1 defense against clogging. A 150-mesh screen filter is standard.
- Pressure Regulator: Reduces your home’s high pressure to a drip-safe level (usually 25 PSI).
- Tubing Adapter: Connects the system to your main 1/2″ or 5/8″ tubing.
- Tubing & Emitters: The lines that carry water and the devices that drip it onto your plants.
Our Top 3 Picks for Beginner-Friendly Kits (2024)
For most DIY gardeners, starting with a kit is the easiest way to ensure you have all the essential components.
- Best Overall: The Rain Bird Drip Irrigation Gardener’s Drip Kit. This kit includes the crucial filter and pressure regulator and provides enough tubing and emitters for a sizable garden. [Check Price on Amazon]
- Most Versatile: The DIG Raised Bed Drip Watering Kit. Excellent for those with multiple raised beds, it includes everything needed for a clean, efficient setup. [Check Price at Home Depot]
- Budget Pick: The Orbit DripMaster 69000 Kit. A solid entry-level option, but we strongly recommend adding a separate, higher-quality filter. [Check Price on Amazon]
Final Verdict & FAQ
Drip Irrigation is FOR YOU if:
- You are watering a vegetable garden, flower beds, trees, or shrubs.
- You want to conserve water and lower your utility bills.
- You value your time and want an automated system.
- You have slopes or irregularly shaped planting areas.
Drip Irrigation is NOT FOR YOU if:
- Your only watering need is a large, uniform lawn.
- You are completely unwilling to clean a filter or winterize the system.
Frequently Asked Questions
1. What is the main disadvantage of drip irrigation?
The main disadvantage is its susceptibility to clogging if not installed with a filter. However, as shown above, this is entirely preventable.
2. How do you keep drip irrigation from clogging?
By using a three-part strategy: 1) Install a filter, 2) Flush the lines seasonally, and 3) Use a pressure regulator to prevent mineral buildup from high pressure.
3. Do I really need a pressure regulator for drip irrigation?
Yes, absolutely. Without one, your home’s water pressure (50+ PSI) will damage the system and can cause emitters to pop off the lines. It is not an optional component.
References & Further Reading
For those looking to dive deeper into the science and best practices of drip irrigation, these academic resources provide excellent, research-backed information:
- Drip Irrigation for Home Gardens – Colorado State University Extension
- Causes and Prevention of Emitter Plugging In Microirrigation Systems – University of Florida, IFAS Extension
- Drip Irrigation – URI Home-A-Syst – The University of Rhode Island