
A unique kind of dread sets in when you see the forecast. The temperature is plummeting, and the fruit tree you’ve nurtured all year is directly in the path of a killing frost. It’s a moment that sends many gardeners scrambling, armed with old blankets and a sense of panic.
But what if you could face that forecast with confidence?
This is more than just a list of tips; it’s a complete playbook. Whether you’re in a last-minute panic or meticulously planning your winter strategy, this guide has you covered. We’ll move from the emergency actions you need to take tonight to the expert-level science and strategies that will protect your harvest year after year. Forget conflicting advice. This is your one-stop resource for keeping your fruit trees safe.
Quick Start: Your Emergency Frost Action Plan for Tonight
The weather forecast just took a nosedive, and a frost is predicted for tonight. Don’t panic. Even if you only have an hour or two before sunset, taking these four steps can provide crucial protection for your fruit tree and prevent devastating damage. This is your emergency checklist.
Step 1: Water the Soil Before Sunset (If Possible)
If the ground isn’t already frozen, give the soil a thorough soaking in a wide circle around the base of your tree. You might think adding water would make things colder, but the opposite is true. Moist soil absorbs more solar heat during the day and radiates it slowly through the night, acting like a small heater for the microenvironment under your tree. This simple action can raise the temperature by a critical 2-5 degrees Fahrenheit (1-3°C).
Step 2: Choose Your Cover (And What to Avoid)
Raid your linen closet. Your goal is to find a breathable material. Old bedsheets, quilts, blankets, burlap, or even large towels are excellent choices.
Crucial Warning: Do NOT use plastic sheeting or a tarp if it will come in direct contact with the leaves. Plastic is not a good insulator and will transfer the cold directly to any foliage it touches, effectively flash-freezing the leaves and causing more damage than the frost itself. If plastic is your only option, you must use it as the top layer of a frame that keeps it far away from the tree itself (see Step 3).
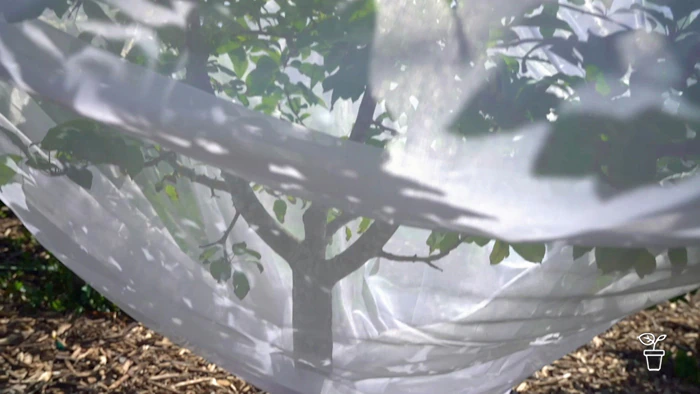
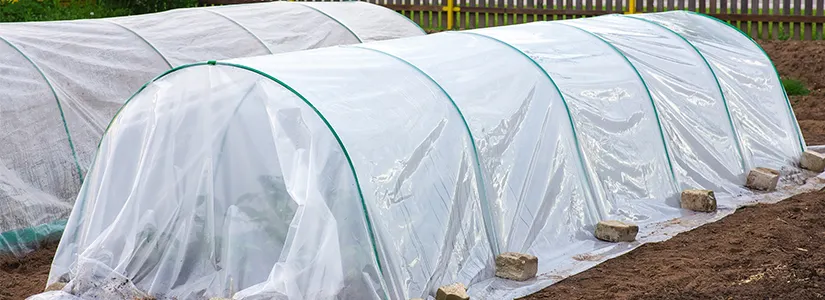
Step 3: Cover Correctly – Build a Tent, Don’t Tuck It In
This is the most important step. The goal is not to tuck your tree into a tight jacket; it’s to create a “tent” that traps the radiant heat escaping from the ground you just watered.
Drape your chosen cover over the entire tree, ensuring it reaches all the way to the ground on every side. Use garden stakes, a stepladder, patio chairs, or tomato cages to create a temporary frame that keeps the material from weighing on the branches and touching the leaves. Anchor the edges of the cover to the ground with rocks, bricks, or soil to trap the warm air pocket inside. Do not tie the cover to the trunk—this lets all the valuable ground heat escape.
Step 4: Uncover in the Morning as Temperatures Rise
As vital as covering your tree is, uncovering it is just as important. Once the frost has melted and the sun is up, remove the cover completely. Leaving it on during a sunny day can cause a rapid temperature spike underneath, essentially cooking the plant and potentially damaging the buds you worked so hard to save.
Understanding Frost: The Science Behind the Threat
To effectively fight an enemy, you have to know it. Not all cold snaps are created equal, and understanding the basic science transforms your efforts from guesswork into a targeted defense.
Radiation Frost vs. Advective Freeze
According to university extension programs, there are two main types of freezes you’ll encounter:
- Radiation Frost: This is the most common foe for home gardeners. It happens on calm, clear nights when the ground radiates its stored heat into the atmosphere. The air closest to the ground becomes coldest. This is the type of frost we can effectively fight with covers and watering.
- Advective Freeze: This is a more powerful weather event, often called a hard freeze. It involves a large mass of cold, windy air moving into an area, dropping temperatures well below freezing for an extended period. While our methods can still help, protection is much more difficult.
The Real Goal: Trapping Ground Heat, Not Just Insulating
Here’s the single most important concept in frost protection: Your primary goal is to trap the Earth’s heat, not to insulate the tree from the cold air.
Throughout the day, the soil soaks up solar radiation. At night, it releases this energy as radiant heat. A proper cover acts like a blanket over the ground, trapping this rising warmth and creating a pocket of slightly warmer air around your tree. This is why anchoring your cover to the ground is non-negotiable. A cover tied to the trunk is like a house with no roof—all the heat simply escapes.
The Critical Question: At What Temperature Should You Act?
“How cold is too cold?” It’s the essential question, but the answer is more nuanced than a single number. While 32°F (0°C) is the freezing point of water, it’s not always the point of catastrophe for your tree.
The 32°F (0°C) General Rule
For a simple, safe benchmark, consider 32°F (0°C) your action temperature. If the forecast calls for temperatures to dip to this level or below, it’s time to put your protection plan into motion. It’s always better to be safe than sorry.
Critical Kill Temperatures for Fruit Buds (From Swell to Blossom)
For the serious hobbyist looking to protect their harvest, the real danger is to the delicate flower buds. Their vulnerability to cold changes dramatically as they develop. As university studies have shown, a temperature that a dormant bud can easily handle will decimate an open blossom.
Here is a simplified table based on research from institutions like Purdue University Extension, showing the critical temperatures that will kill 10% and 90% of buds at various stages.
| Development Stage | Apple Trees (Temp °F / °C) | Peach Trees (Temp °F / °C) |
|---|---|---|
| 10% Kill / 90% Kill | 10% Kill / 90% Kill | |
| First Swell (Buds Swelling) | 15°F / -9°C | 18°F / -8°C |
| Full Bloom (Flowers Open) | 28°F / -2°C | 26°F / -3°C |
| Post-Bloom (Small Fruitlets) | 28°F / -2°C | 28°F / -2°C |
How to Use This Table: If your peach tree is in full bloom and the forecast predicts a drop to 26°F (-3°C), you are facing a potential 90% crop loss. This data transforms your decision from “Should I cover?” to “I absolutely must cover.”
Choosing Your Defense: A Head-to-Head Comparison of 7 Strategies
There are many ways to protect a tree, ranging from free, last-minute fixes to significant investments. Here’s a breakdown of the most common strategies, complete with a comparison to help you choose the right one for your situation.
The Big Picture: Our Ultimate Comparison Matrix
| Strategy | Effectiveness | Cost | Labor | Best For |
|---|---|---|---|---|
| 1. Covering (Properly) | High | Low-High | Medium | Almost all home garden situations. |
| 2. Trunk Protection | Medium | Low | Low | Young trees, preventing sunscald. |
| 3. Active Heating | Medium-High | Medium | Medium | Citrus, high-value individual trees. |
| 4. Using Water (Sprinklers) | Very High | High | High | Commercial orchards; risky for home use. |
| 5. Using Water (Soil) | Low-Medium | Free | Low | A supplementary, easy-to-add measure. |
| 6. Site Selection | High | Free | N/A | Pre-planning before you even plant. |
| 7. Air Movement | High | Very High | Low | Commercial orchards, not for home use. |
Strategy #1: Covering (The Most Reliable for Home Gardeners)
This is the gold standard for a reason. But not all covers are equal.
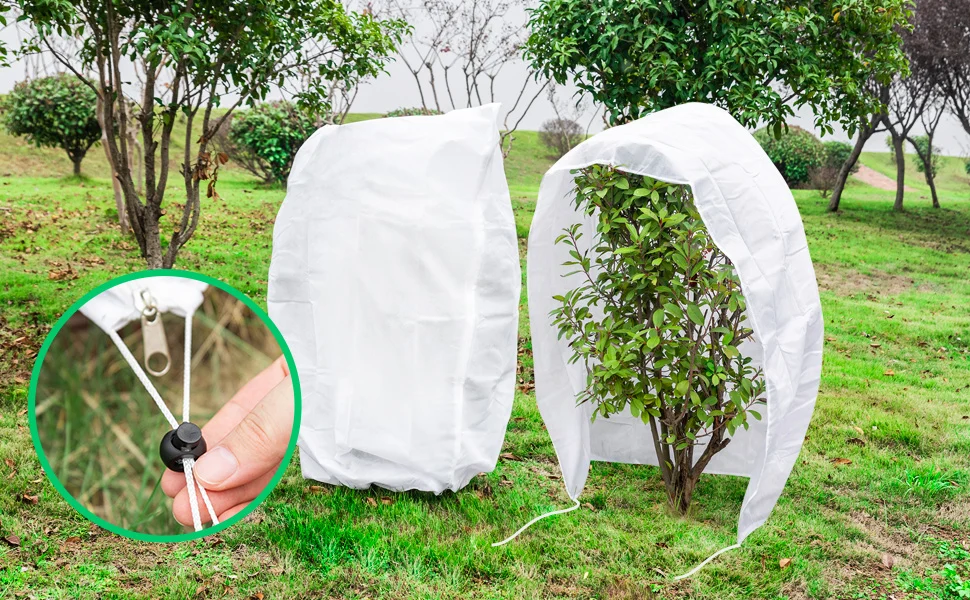
- Commercial Frost Blankets: These are made from spun polypropylene and are designed for this exact purpose. They are lightweight, breathable, and provide excellent protection (2-8°F depending on thickness).
- The ROI of a Quality Frost Blanket: A good frost blanket might cost $30-$60, which seems expensive compared to an old sheet. But consider the Total Cost of Ownership. A durable blanket will last 5-10 years. An old sheet might rip after one season.
- 5-Year Cost: Quality Blanket = $10/year. Old Sheets (if you have to replace them) = $15+/year.
- When you factor in the superior protection and ease of use, a proper frost blanket is the smartest long-term investment.
- Burlap & Sheets: Perfectly acceptable, especially for emergencies. Their main downside is that they are heavy when wet and can damage branches if not supported by a frame.
Strategy #2: Trunk Protection (Essential for Young & Thin-Barked Trees)
For young trees, the thin bark on the trunk is highly susceptible to “sunscald” or “southwest injury,” where daytime sun and freezing nights cause the bark to split. Wrapping the trunk with commercial tree wrap or painting it with white latex paint can prevent this. While this doesn’t protect the buds, it’s critical for the tree’s overall long-term health.
Strategy #3: Active Heating (The Truth About Christmas Lights)
Yes, you can add a heat source, but you must be strategic.
- The Christmas Light Myth, Busted: The popular trick of stringing Christmas lights on a tree only works if you use the old, inefficient incandescent bulbs (like C7 or C9). Modern LED lights produce virtually no heat and are completely useless for frost protection.
- If you use incandescent bulbs, place them safely under the cover, ensuring they don’t touch the material or the tree directly. A single 100-watt bulb can make a significant difference in the microclimate under a well-sealed cover.
Strategy #4: Using Water (How Pros Use Ice to Insulate)
Commercial orchards use overhead sprinklers that run all night. As water freezes on the blossoms, it releases latent heat, keeping the plant tissue at a stable 32°F (0°C). This is a high-risk, high-reward strategy. If the sprinklers stop, the evaporation can make things even colder. The sheer weight of the ice can also break branches. This is not recommended for home gardeners.
Our Final Verdict: The Best All-Around Strategy for Most Home Gardens
For 99% of home gardeners, the winning combination is:
- Watering the soil before a predicted frost.
- Covering the tree with a commercial frost blanket, secured to the ground to create a tent.
- For high-value or tender trees (like citrus), add a single, safely placed 100W incandescent bulb under the cover.
5 Critical Mistakes That Can Kill Your Tree (And How to Avoid Them)
Sometimes, the greatest harm comes from good intentions gone wrong. Avoid these common but potentially fatal errors.
- Mistake #1: Using Plastic That Touches the Leaves. As mentioned, this is the cardinal sin. It acts as a super-conductor for cold and will burn the leaves.
- Mistake #2: Forgetting to Uncover During the Day. You saved your tree from the frost, only to have it cook in the sun. Set a morning alarm on your phone to remind yourself to remove the cover.
- Mistake #3: Pruning at the Wrong Time. A heavy pruning in early winter can stimulate new growth that is extremely vulnerable to a late freeze. Save major pruning for late winter or very early spring.
- Mistake #4: Securing Covers to the Trunk. This creates an “umbrella,” not a “tent.” It allows all the precious ground heat to escape into the night sky. Always secure covers to the ground.
- Mistake #5: Ignoring Overall Tree Health. A stressed, under-watered, or poorly nourished tree enters winter at a disadvantage. Healthy, vigorous trees are naturally more resilient to cold stress.
After the Frost: A Step-by-Step Recovery Guide
Sometimes, despite your best efforts, the frost wins. You walk out to find blackened leaves and limp blossoms. The key now is calm, patient care.
How to Assess the Damage: A Patient, Step-by-Step Diagnosis
A proper damage assessment isn’t a quick glance; it’s a process of patient observation. Here’s what to look for and when, moving from the most obvious signs to the more subtle clues.
1. The Immediate Aftermath (The First 24 Hours)
This is when damage to the most tender parts becomes obvious.
- Flowers and Buds (The Most Vulnerable):
- The Pistil Test: This is the most definitive way to check blossoms. Carefully slice one open with your fingernail. The very center of the flower is the pistil. If it’s bright green, it has survived. If it’s brown or black, that specific blossom is dead and will not produce fruit. Check flowers from various parts of the tree to estimate the potential crop loss.
- Visual Signs: Damaged blossoms will appear water-soaked and wilted, quickly turning dark and falling off.
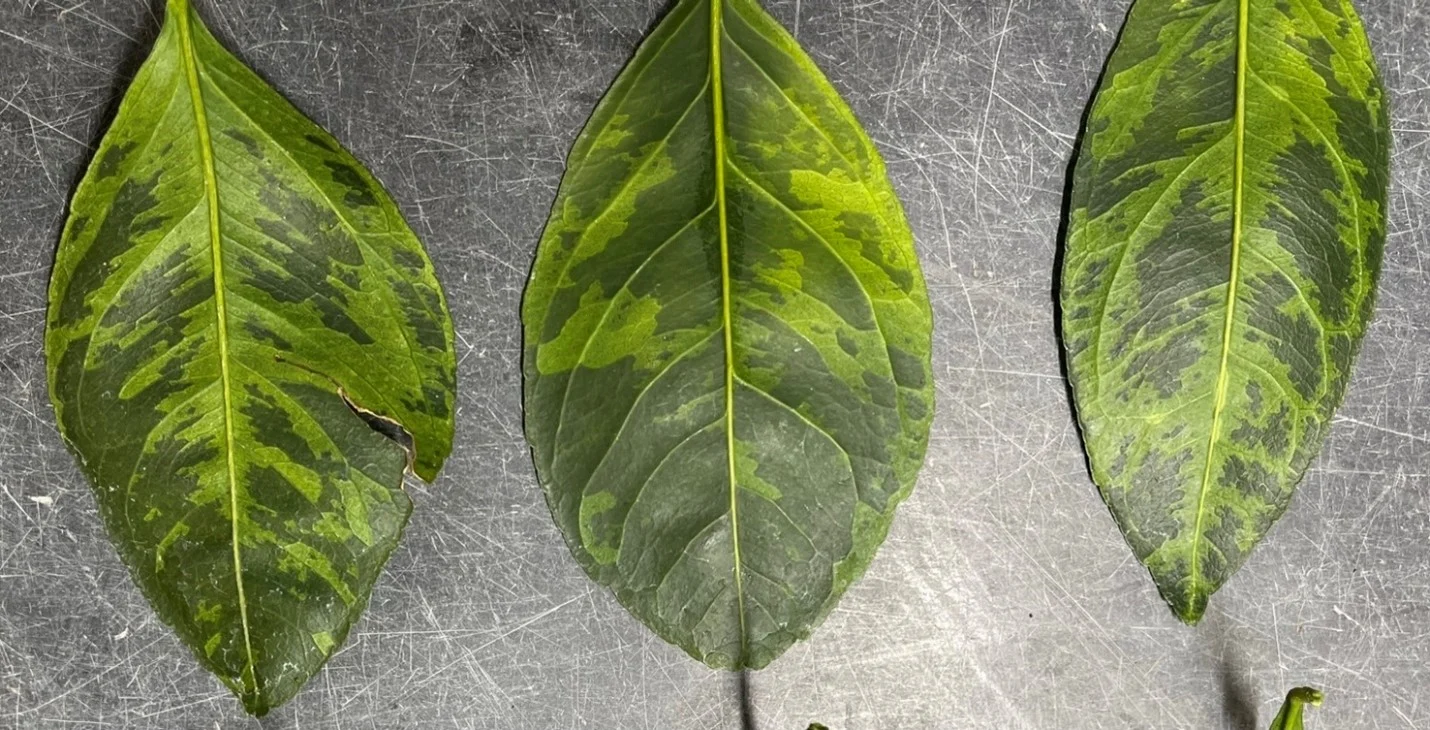
- Leaves:
- Young, new leaves will look dark and feel limp, like cooked spinach. Within a day, they will become dry and brittle.
2. The Following Weeks (1-3 Weeks Later)
Now you can start assessing damage to the woody parts of the tree.
- The Scratch Test: This is a classic gardener’s technique to check for life. With your fingernail or a clean knife, gently scratch a tiny piece of bark from a suspect twig.
- Green Underneath: Success! The cambium layer is alive, meaning there’s a good chance that part of the tree will recover.
- Brown or Mushy Underneath: This indicates the tissue is dead.
- Buds: Compare buds on different branches. Healthy buds will begin to swell as the weather warms. Damaged buds will remain dormant, look dry, and may flake off easily.
3. Long-Term Observation (1 Month+ Later)
By now, the tree is revealing its own recovery plan. New growth will be emerging from healthy wood, creating a clear demarcation line between the living and dead sections. This is the point at which you can confidently see the full extent of the damage and begin planning your first corrective prune.
The Waiting Game: Why You Must Not Prune Immediately
Your first instinct will be to prune away all the ugly, damaged parts. Resist this urge.
As advised by experts at institutions like the Arbor Day Foundation, damaged foliage, while unsightly, is now providing a layer of protection for the undamaged tissue beneath it. Pruning too early can expose healthy parts of the tree to the next frost. Wait until you are certain all danger of frost has passed for the season and you see clear signs of new growth. Only then can you accurately see the line between dead and living wood.
A Gentle Recovery Plan
- Wait: Do not prune. Do not fertilize.
- Water: Ensure the tree is adequately watered. Proper hydration is key to recovery.
- Observe: After the frost danger is gone, look for new buds and leaves. Prune back dead branches to just above a healthy new bud or a main branch.
Beyond Frost: Other Essential Winter Care Tasks
Frost protection is just one part of a complete winter care strategy. These tasks ensure your tree is healthy and ready for a productive spring.
- The Right Window for Winter Pruning: For most deciduous fruit trees, the best time to prune is in late winter (e.g., February to early April), when the tree is fully dormant but just before it begins to push out new growth.
- Pest Control with Dormant Oil & Winter Washing: Spraying with horticultural dormant oil during the dormant season can suffocate overwintering pest eggs (like aphids and scale). This dramatically reduces pest pressure in the spring.
- Root Protection with Mulch: A 3-4 inch layer of organic mulch (like wood chips or straw) around the base of the tree (but not touching the trunk) acts like a blanket for the roots, insulating them from extreme temperature swings.
Your Winter Protection Strategy, Simplified
Facing the threat of frost doesn’t have to be a yearly panic. By understanding the simple science of trapping ground heat, knowing the critical temperatures for your specific trees, and choosing the right combination of strategies, you can take control.
Start with a plan. Invest in a good-quality frost blanket. Pay attention to the weather. And remember that a healthy, well-cared-for tree is its own best defense. Now you’re ready to face the forecast not with dread, but with a clear plan of action.
References and Further Reading
For those who wish to dive deeper into the science and data behind fruit tree protection, we recommend the following resources from trusted horticultural and agricultural institutions.
-
Assessing Frost and Freeze Damage to Fruit Trees – A detailed publication from Purdue University Extension, providing data on critical temperatures for various fruit crops.
- Frost Protection for Citrus and Other Subtropicals – From the University of California, this guide offers in-depth explanations of frost types and protection methods.
- What to Do When Winter Weather Damages Your Trees
Frequently Asked Questions (FAQ)
1. At what exact temperature should I cover my fruit trees?
The safest bet is to cover them if the temperature is forecast to drop to 32°F (0°C) or below. However, if your tree is in full bloom, you should consider covering it at temperatures as high as 34-35°F (1-2°C), as delicate blossoms can be damaged even before a hard frost forms.
2. Can I use a plastic tarp to protect my trees?
You should only use plastic if it is part of a frame that prevents it from touching any part of the tree. Direct contact with plastic will cause severe frost burn on the leaves. A breathable fabric, like a sheet or frost blanket, is always a safer choice.
3. How long should I leave the cover on my fruit tree?
Remove the cover first thing in the morning after the frost has melted and the ambient temperature is safely above freezing (e.g., above 35°F / 2°C). Leaving it on during a sunny day can cause the temperature to spike underneath, potentially damaging the plant.
4. My tree is too large to cover. What can I do?
For very large trees, focus on what you can control. Water the soil thoroughly to maximize radiant heat. If the tree is young, wrap the trunk to prevent sunscald. For high-value trees, you might consider using multiple heat sources (like several 100W incandescent bulbs) under a partial cover or even renting a commercial orchard fan for a critical night if the crop is valuable enough.
5. I pruned my frost-damaged branches already. Have I killed my tree?
You likely haven’t killed the tree, but you may have exposed it to further damage if another frost occurs. The best course of action now is to do nothing further. Water it appropriately and wait for spring to see where new growth emerges. Avoid any further pruning or fertilizing until the tree shows clear signs of recovery.